You've got a WordPress site, you've got something to say, and you're staring at the dashboard wondering where the "new post" button went. Or you found it, and now there's a blank screen full of little plus signs.
Here's the deal: writing the post is the easy part. The parts people skip are the ones that decide how the post looks when it's shared, where it shows up on your site and whether it goes live when you meant it to. This guide covers all of it, step by step.
These steps are for the default WordPress block editor in WordPress 6.8 and later (checked October 2026). If your screen looks different, the next section helps you work out why.
The quick answer
- Go to yoursite.com/wp-admin and log in.
- Click Posts > Add Post.
- Add a title, then write your content.
- Open Settings (top right) and, on the Post tab, set a featured image, an excerpt and a category.
- Click Publish, check the summary, then click Publish again. Or schedule it for later.
Which editor are you looking at?
WordPress has had more than one editor over the years, and plugins add their own. Before you follow any guide (this one included), check which one you've got:
- Block editor. A big empty page with a title area and "+" buttons. A Settings panel on the right with Post and Block tabs. This is the default, and it's what most of this post covers (WordPress.org: WordPress Block Editor).
- Classic editor. A toolbar that looks like an old word processor, with Visual and Text tabs and boxes down the right side labeled Publish, Categories and Featured image. Your site has the Classic Editor plugin, or a theme or builder that switches it on. Skip to the classic editor section below.
- A page builder. A big button like "Use the Divi Builder" or "Edit with Elementor." That's a plugin layered on top. You can still use the steps here for the title, excerpt, image, category and publishing. The builder only changes how you lay out the content.
Step 1: Log in to your dashboard
Every WordPress site has an admin area at your site address plus /wp-admin. So if your site is example.com, go to example.com/wp-admin and log in with your WordPress username and password.
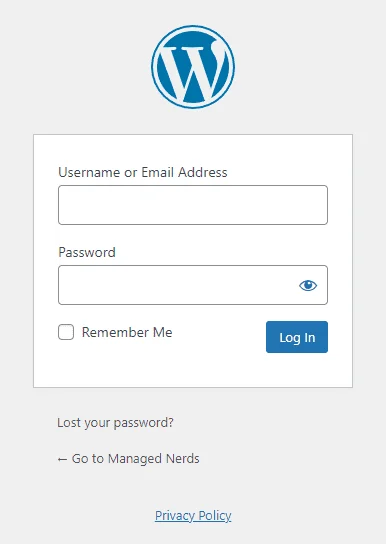
The default WordPress login screen. Yours may have your logo on it.
You need an account that's allowed to write posts. In WordPress terms that's an Author, Editor or Administrator. A Contributor can write and save drafts but can't publish; someone else has to approve them.
Step 2: Start a new post
In the menu on the left, hover over or click Posts, then click Add Post. Or click Posts > All Posts and use the Add Post button at the top of the list.
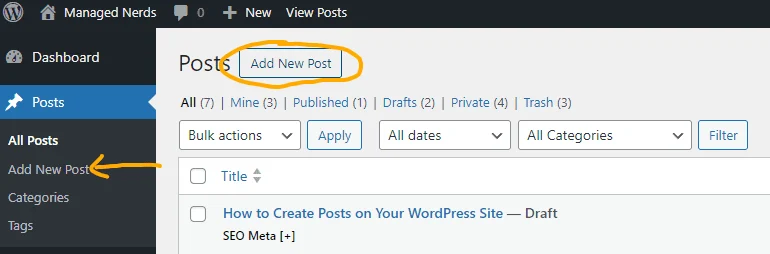
Older WordPress versions label it "Add New Post" or "Add New." Same button.
Step 3: Write the title and content
Click the title area at the top and type your title. Make it the question or problem your reader would actually search for. "Why does my furnace smell like burning dust?" beats "Fall Maintenance Update."
Then click below the title and start typing. Each paragraph, heading, image or list is its own "block." To add something other than text, click a + button and pick the block you want (Heading, Image, List and so on). The WordPress.org guide to working with blocks has the full tour.
A few habits that make posts easier to read:
- Use Heading blocks for your section titles, not bold text. Readers skim headings, and so do search engines.
- Keep paragraphs short. Two to four sentences.
- Give every image alt text (a plain description of the picture) in the image block's settings. It's how people using screen readers know what's there.
Save draft is at the top right. WordPress also autosaves, but I'd still click it before you go hunting through settings.
Step 4: Open the post settings
Click Settings at the top right, next to Publish. A panel opens on the right. Make sure the Post tab is selected, not Block. Everything in the next three steps lives here (WordPress.org: Page/Post Settings sidebar).
Step 5: Set a featured image
In the Post tab, click Set featured image at the top. Pick an image from your Media Library, or click Upload files to add one from your computer.
Why bother? Your theme decides where the featured image appears, but it's usually the image on your blog's post list, and social sites often use it as the preview picture when someone shares the link. No featured image, and your post shows up as a gray box or a random image from the page. Nobody clicks a gray box.
Step 6: Write an excerpt
Below the featured image, click Add an excerpt… and write one or two sentences about what the reader gets from the post.
If you leave it blank, WordPress makes one for you from the first 55 words of the post (WordPress.org: What is an excerpt?). That's often the least interesting 55 words you wrote.
What the excerpt does not do on its own is control what Google shows in search results. Google says its snippets are "primarily created from the page content itself," and it only sometimes uses a page's meta description (Google Search Central: snippets). Some themes and SEO plugins copy your excerpt into the meta description, so a good excerpt can help there too. But write it for your readers first: it's what shows on your blog page and in a lot of themes' "related posts" lists.
Step 7: Pick a category
Scroll down the Post tab to Categories. Tick the one that fits, or click Add Category to make a new one.
Don't leave a post in Uncategorized. That's the default category WordPress creates when it's installed, and every post you forget to categorize lands there. It tells readers nothing. If you've got nothing but Uncategorized, rename it to something real under Posts > Categories, or change the default under Settings > Writing > Default Post Category.
My preference is one category per post. If you do pick more than one and your post URLs include the category, check what the URL ends up as before you publish. Some SEO plugins add a "primary category" option for exactly this; if yours has it, set it. Changing a category later can change the URL, and any links already pointing at the old one break unless you set up a redirect.
You can also add Tags in the same panel. Treat them like an index: a few specific topics, not a list of every word in the post.
Step 8: Preview, then publish (or schedule)
Read it once more for spelling. Then check what it'll look like: click View at the top (the screen icon) and choose Preview. It opens in a new tab.
When you're happy:
- Click Publish at the top right.
- WordPress shows a check panel ("Are you ready to publish?") with your visibility, publish date and a few suggestions.
- Click Publish again to make it live.
To schedule it instead, in the Post tab, find Publish with the value Immediately. Click it, pick a date and time, and the top button changes to Schedule. Your site publishes it at that time, using the time zone set under Settings > General.
Status in the same panel lets you make a post Private (only admins and editors can see it) or Password protected.
Once it's live, WordPress shows the post's link with a Copy button. That's the URL you share.
Step 9: Share it
If your business is on LinkedIn, Facebook or anywhere else, post the link there. A post nobody knows about doesn't do much. That's the featured image and excerpt paying off: they're often what shows in the preview.
Sharing gets the post in front of people who might link to it, forward it or come back when they need you. I wrote more about how the two fit together in Social media and SEO: how they work together.
Using the classic editor instead
If your screen has Visual and Text tabs and a Publish box on the right, you're in the classic editor. Same ideas, different places:
- Featured image: a Featured image box on the right side. Scroll down if you don't see it, then click Set featured image.
- Categories: a Categories box on the right.
- Excerpt: hidden by default. Click Screen Options at the very top right of the screen and tick Excerpt. The box appears below the editor.
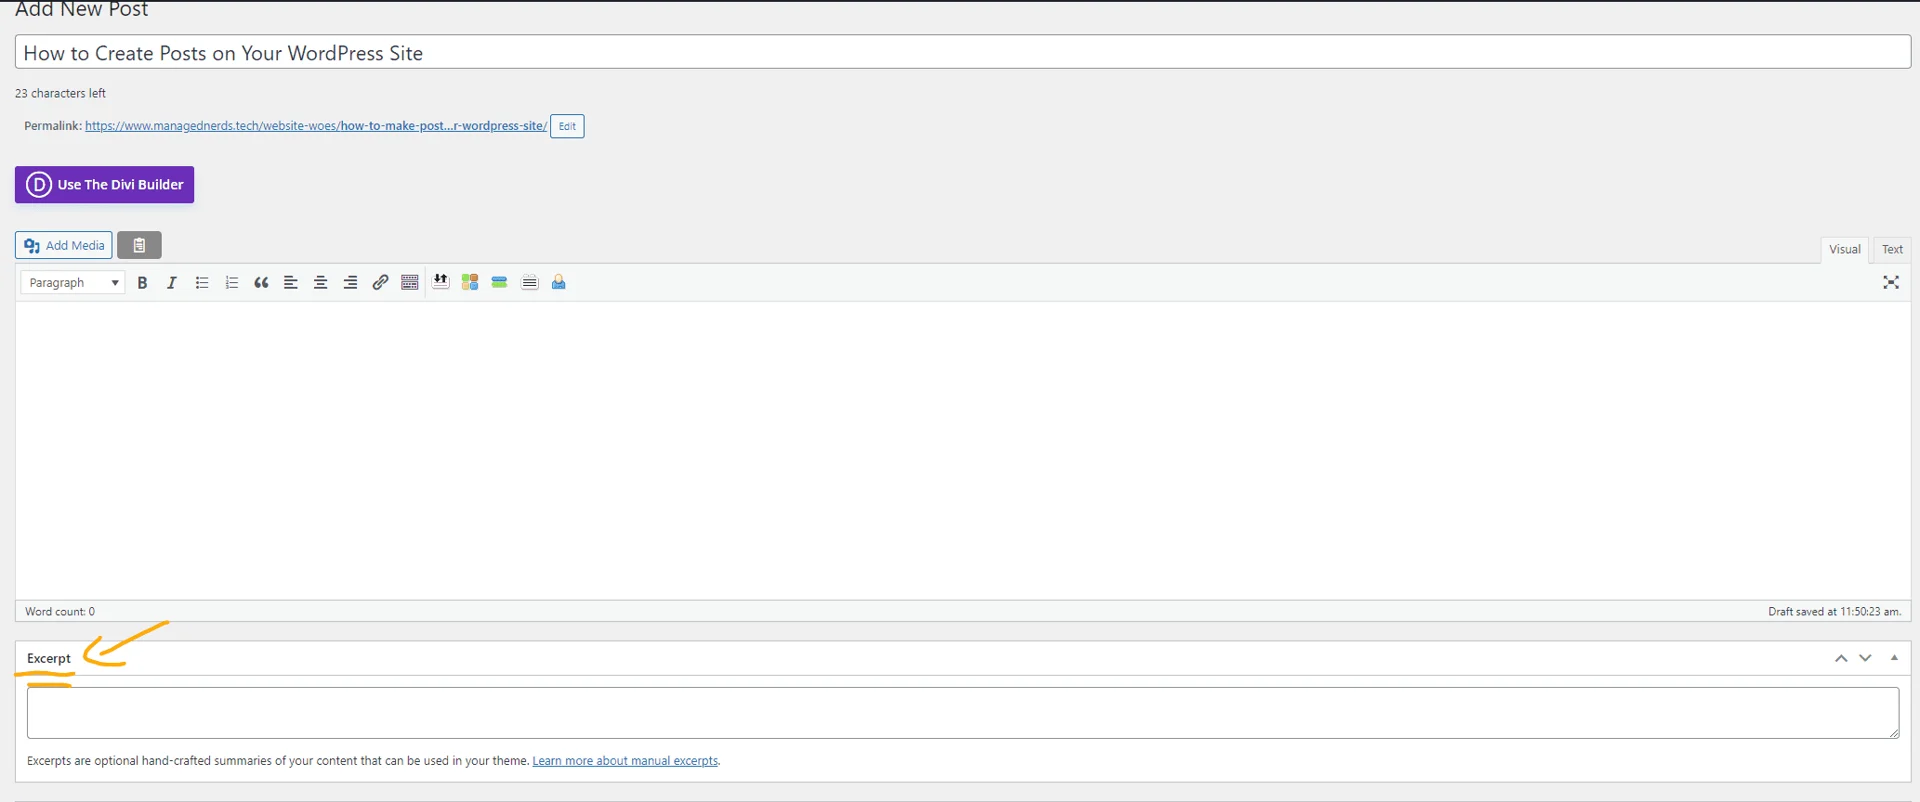
In the classic editor, the Excerpt box sits below the content area once it's turned on.
- Publish and schedule: the Publish box at the top right. Preview is there too. To schedule, click Edit next to Publish immediately, pick the date and time, click OK, and the button changes to Schedule.
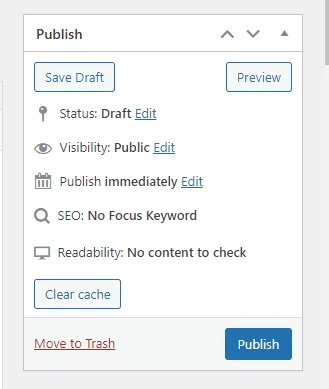
The classic Publish box. Extra lines like "SEO" come from plugins.
Why these steps matter
A post has two jobs: be useful to the person reading it, and be findable by the next person who has the same question. Google says its ranking systems are designed to "prioritize helpful, reliable information that's created to benefit people" (Google Search Central: Creating helpful content). The same page warns against pumping out lots of content on lots of topics in the hope some of it ranks. So posting more often doesn't do the work for you. Answering real customer questions well does.
The settings around the post (title, featured image, excerpt, category) are how that content gets presented everywhere except the post itself. Skip them and a good post looks like a broken one.
If something went wrong
- It went live too early. Open the post, click Status in the Post tab and change it to Draft, then save. If people or search engines may already have seen it, assume they did.
- Your post isn't showing on the blog page. Check its status (Draft, Scheduled or Private won't show) and that the publish date isn't in the future.
- The URL is wrong. Change the slug under Link in the Post tab before you share it. After it's been shared, set up a redirect from the old URL.
- The share preview shows the wrong picture. Set the featured image, update the post, then share again. Social sites cache previews, so an old share may keep the old picture for a while.
Keeping this safe in a business
Here's the part that catches people out: anything you upload to the Media Library gets its own public web address the moment it's uploaded. The post can still be a draft. The file isn't hidden; it's just unlinked. A file uploaded early and sitting at a guessable address is how the UK's budget documents leaked ahead of time in November 2025, through a WordPress site. I covered that in The WordPress slip-up that leaked the UK budget.
So:
- Don't upload anything confidential (price lists, client documents, unreleased announcements) to the Media Library ahead of time.
- Give people the lowest role that works. A staff member who writes posts needs Author or Contributor, not Administrator.
- Use Contributor for new writers so someone reviews posts before they go live.
- One person checks every post for spelling, the featured image, excerpt and category before it's published.
- Every WordPress account gets a strong, unique password, and two-factor login if your site supports it.
When to get help
- You can't log in, or nobody's sure who has admin access to the site.
- WordPress, the theme or plugins haven't been updated in months, and you're nervous to click the button.
- Posts look broken after publishing, or your post URLs changed and old links now go nowhere.
That's the kind of thing our WordPress hosting and security service covers. If you'd rather talk it through first, get in touch.



No comments yet